


how to install kitchen sink drain in 7 Amazing Steps (Ultimate DIY Hack You Won’t Believe)
")
Let’s be honest — the first time you stare under a kitchen sink at a tangle of pipes, it can feel like you’re looking at a puzzle with missing pieces. But here’s the truth: learning how to install kitchen sink drain plumbing is one of the most rewarding DIY projects you can tackle on a weekend. No plumber’s bill. No scheduling headaches. Just you, a few basic tools, and this step-by-step guide.
Whether you’re figuring out how to replace a kitchen sink drain after years of buildup, how to hook up a sink drain in a newly renovated kitchen, or simply how to install a kitchen sink from scratch, this guide walks you through every step with clarity and confidence. By the end, you’ll know exactly how to install kitchen sink drain components the right way — and you might even enjoy the process.
Why Knowing How to Install Kitchen Sink Drain Plumbing Matters
A slow-draining or leaking kitchen sink is more than an annoyance. Over time, a poorly installed or worn-out drain can cause water damage under the cabinet, mold growth, foul odors, and costly structural repairs. Understanding how to install kitchen sink drain plumbing correctly the first time saves you money and headaches down the road.
Here’s why this skill matters more than most people realize:
- The average plumber charges $150–$350 for a drain installation — a job you can do yourself in under two hours.
- DIY drain replacement reduces the risk of overtightened or cross-threaded fittings that untrained contractors sometimes cause.
- Knowing how to replace a sink drain means you can respond quickly to leaks before they escalate.
- It builds foundational home maintenance knowledge that applies to bathrooms, laundry rooms, and utility sinks too.
Tools and Materials You Need Before You Begin
Before you learn how to install a kitchen sink drain, gather everything upfront. Making mid-project hardware store runs is the number one reason DIY jobs take twice as long as they should.
Required Tools
- Adjustable pliers or channel-lock pliers
- Plumber’s putty or silicone sealant
- Bucket or towels (for catching residual water)
- Drain basket or drain assembly kit (flange, gasket, locknut, strainer)
- P-trap assembly
- Drain extension tubes (1-1/2 inch or 1-1/4 inch, depending on your sink)
- Hacksaw or pipe cutter (if trimming pipes to length)
- Screwdriver (flathead and Phillips)
Pro Tip on Materials
When replacing an older drain, buy a complete drain assembly kit rather than individual parts. Kits are standardized to fit most kitchen sinks and typically include all the washers, gaskets, and locknuts you need. This is especially useful when figuring out how to replace a sink that uses non-standard fittings.
How to Install Kitchen Sink Drain: The 7-Step Process
Follow these seven steps carefully and you’ll have a properly functioning drain installed with zero leaks. This process covers both how to replace a kitchen sink drain and how to set one up in a new installation.
Step 1: Turn Off the Water Supply and Clear the Cabinet
Safety first. Before you do anything else, turn off the hot and cold water supply valves under the sink. Even though installing a drain doesn’t technically require the water to be off, you’ll inevitably bump into something. Place a bucket under the existing drain assembly to catch any standing water in the P-trap. Remove everything from under the cabinet so you have a clear working space — good lighting is your best friend here.
Step 2: Remove the Old Drain Assembly (For Replacements)
If you’re learning how to replace a kitchen sink drain, start by disconnecting the P-trap from the drain tailpiece. Use your pliers to loosen the slip-nut fittings — hand-tighten only; you don’t want to crack older plastic fittings. Once the P-trap is free, unscrew the locknut beneath the sink basket using your pliers (it spins counterclockwise). From the top of the sink, push up on the flange and lift the old basket out. Scrape away old plumber’s putty or silicone from the drain opening with a putty knife.
Step 3: Apply Plumber’s Putty or Silicone to the New Drain Flange
Roll a rope of plumber’s putty (about the thickness of a pencil) and press it around the underside lip of the new drain flange. For granite composite, stainless steel, or other non-porous sinks, use silicone sealant instead — plumber’s putty can stain these surfaces. This seal is critical for how to install kitchen sink drain plumbing without leaks forming at the top flange level.
Step 4: Insert the Drain Basket and Secure from Below
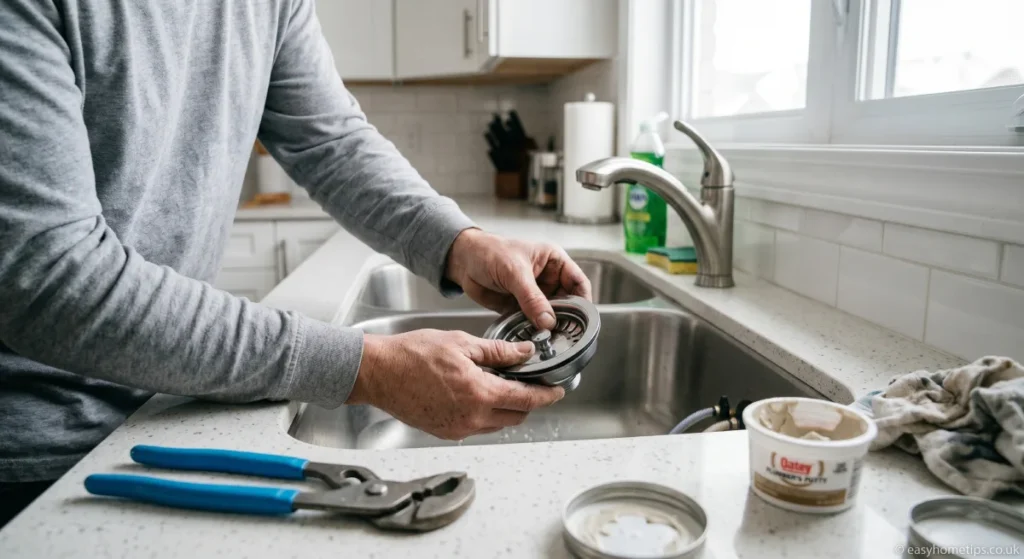
Press the drain flange firmly down into the sink drain opening from above. Head under the sink and slide the rubber gasket, then the cardboard friction ring (if included), and finally the metal locknut onto the drain tailpiece. Hand-tighten the locknut clockwise until snug. Then use your pliers to tighten further — firm and secure, but not so tight that you crack the sink basin. Excess putty will squeeze out from around the flange; wipe it away cleanly.
Step 5: Install the Drain Tailpiece and Extension Tubes
Thread the drain tailpiece onto the bottom of the basket strainer by hand, then snug it with pliers. This is the vertical pipe that connects your basket to the P-trap. If you’re working with a double basin sink, you’ll need a continuous waste fitting — a T- or Y-shaped connector that joins both basins before leading to a single P-trap. Measure carefully and cut pipes to fit using your hacksaw if needed. This step is key when learning how to hook up a sink drain in more complex configurations.
Step 6: Connect the P-Trap to the Drain and Wall Pipe
The P-trap is the curved section of pipe that holds a small amount of water at all times, creating a seal that blocks sewer gases from entering your home. Slide one end of the P-trap onto the drain tailpiece and the other end toward the drain stub-out in the wall. Use slip-nut fittings to connect both ends. Hand-tighten first, check alignment, then snug up with pliers — quarter-turn increments. The P-trap’s curve should always face downward. Properly connecting the P-trap is one of the most important parts of how to install a kitchen sink drain correctly.
Step 7: Test for Leaks and Make Final Adjustments
Turn the water supply back on. Run the hot and cold water simultaneously for a full minute. While the water flows, get under the sink with a flashlight and dry towel and check every connection point: the top flange, the tailpiece, all slip-nut joints, and the P-trap. Run your hand or the dry towel along each joint to detect even minor drips. If you find a leak, tighten that fitting another quarter-turn. If it persists, disassemble, add fresh plumber’s tape or putty, and reassemble. A successful, leak-free test means you’ve completed how to install kitchen sink drain plumbing like a pro.
Common Mistakes to Avoid When You Replace a Kitchen Sink Drain
Even experienced DIYers make these errors when learning how to replace a sink or install drain plumbing. Avoid them and your job will go smoothly from start to finish.
- Over-tightening fittings: Plastic slip-nuts crack under excessive force. Snug and hand-firm is enough for most connections.
- Skipping the gasket: The rubber washer between the drain basket and the sink bottom is what creates the watertight seal. Never leave it out.
- Wrong pipe diameter: Kitchen sink drain pipes are typically 1-1/2 inches. Bathroom sinks use 1-1/4 inches. Mixing them causes poor fits and leaks.
- Misaligned P-trap: If the trap’s curve faces up or sideways, it won’t hold water and sewer gases will enter your home.
- Using plumber’s putty on the wrong surface: On granite or stainless steel sinks, putty stains. Use silicone sealant instead.
- Not testing long enough: Run water for a full minute — not just a few seconds. Some leaks only show under sustained flow.
How to Install a Kitchen Sink Drain for Double Basin Sinks
Double basin sinks are the most common kitchen configuration, and many guides skip over this nuance. When you install kitchen sink drain plumbing for two basins, both drains must feed into a single P-trap using a continuous waste fitting or a center outlet waste kit.
The center outlet kit connects at the midpoint between both basins, with extension tubes running to each drain tailpiece. This is the cleanest and most space-efficient setup for double basin installations. Follow the same 7 steps above, treating the center outlet as the starting point for your P-trap rather than a single tailpiece.
If your two basins are at different heights (common in farmhouse or apron-front sinks), use a baffle tee fitting to equalize the flow before it enters the P-trap. This prevents the gurgling noise that happens when water from one basin displaces air in the other.
Installing a Kitchen Sink Drain with a Garbage Disposal
If your kitchen has or will have a garbage disposal, the drain installation changes slightly. The disposal replaces the standard basket strainer on the main basin. Instead of a locknut-secured flange, the disposal unit mounts using a three-bolt mounting ring. The drain connection exits from the side of the disposal unit into the P-trap system.
Key tips when hooking up a sink drain with a garbage disposal:
- If you have a dishwasher, knock out the dishwasher drain inlet plug on the side of the disposal before mounting it.
- Connect the dishwasher drain hose to the disposal inlet and secure with a hose clamp.
- Use the discharge elbow on the disposal outlet to connect to the P-trap extension tube.
- Always run water before and after running the disposal to flush debris fully through the P-trap.
Frequently Asked Questions About Kitchen Sink Drain Installation
Q: How long does it take to install a kitchen sink drain?
For a straightforward single basin replacement, most homeowners can complete the job in 30 to 60 minutes once they have all materials ready. A new installation or double basin setup may take 1.5 to 2.5 hours. The process for how to install kitchen sink drain components is genuinely beginner-friendly with the right preparation.
Q: Do I need to use plumber’s putty to install a kitchen sink drain?
Plumber’s putty is the traditional choice for sealing the drain flange on porcelain and cast iron sinks. However, for granite composite, stainless steel, or any non-porous sink material, use silicone sealant to avoid staining. Some modern drain assemblies come with a pre-applied rubber gasket that eliminates the need for putty entirely — always check your kit’s instructions.
Q: My drain leaks at the slip nut — what should I do?
First, try tightening the slip nut another quarter-turn. If it still leaks, disassemble the joint and inspect the nylon slip washer inside. If it’s cracked, flattened, or missing, replace it — these washers cost cents at any hardware store. Reassemble and test again. This is the most common issue people encounter when figuring out how to hook up a sink drain, and it’s always an easy fix.
Q: Can I replace just the drain basket without replacing the whole P-trap?
Absolutely. If your P-trap is intact and leak-free, there’s no reason to replace it. Simply follow Steps 1–4 above to swap the basket strainer and flange, then reattach your existing tailpiece and P-trap. When you replace a kitchen sink drain basket only, the job is even faster — often under 20 minutes.
Q: What size drain does a kitchen sink use?
Standard kitchen sink drain openings are 3-1/2 inches in diameter. The drain pipes themselves are 1-1/2 inches. This is important to confirm before purchasing replacement parts, especially if you’re replacing a very old sink. Verify your opening size before you install kitchen sink drain components to avoid an extra hardware store trip.
You’re Ready to Install Your Kitchen Sink Drain Like a Pro
There you have it — a complete, step-by-step walkthrough of how to install kitchen sink drain plumbing in seven clear, actionable steps. From shutting off the water supply to testing every joint for leaks, you now have everything you need to tackle this project with real confidence.
Remember: the key to any successful drain installation is preparation, patience, and not over-tightening. Whether you’re learning how to replace a kitchen sink drain that’s been leaking for months, discovering how to hook up a sink drain in a brand-new renovation, or mastering how to install a kitchen sink from top to bottom — the process is well within reach for any motivated homeowner.
The next time you hear someone complain about a slow drain or a drip under their cabinet, you’ll be the one with the answer. And you’ll know you put that knowledge to work yourself.
READY TO GET STARTED?
Gather your tools, grab a drain assembly kit from your local hardware store, and set aside a Saturday morning. You’ve got this. Share this guide with a friend who’s been putting off that leaky sink repair — they’ll thank you for it!
")
")

")

