


How to Create a Rain Garden: The Ultimate Easy Guide (2026)
If your yard turns into a soggy mess every time it rains, you’re not alone. Learning how to create a rain garden is one of the smartest, most eco-friendly things a homeowner can do.
A rain garden is a shallow, planted depression that collects stormwater runoff from roofs, driveways, and lawns. Instead of rushing into storm drains, rainwater soaks slowly into the ground — reducing flooding, filtering pollutants, and supporting local wildlife.
The best part? You don’t need to be a landscaping expert. With the right plan and a free weekend, you can build a beautiful, functional rain garden that makes your property more sustainable for years to come.
What Is a Rain Garden and Why Should You Build One?
A rain garden is more than just a pretty flower bed. It’s a purposeful low-impact development tool designed to mimic nature’s own water cycle.
When rain hits hard surfaces like driveways and rooftops, it picks up oils, fertilizers, and sediment before rushing into waterways. A well-placed rain garden intercepts that flow before it causes damage.
Key Benefits of a Rain Garden
- Reduces stormwater runoff by up to 30–40% per storm event
- Filters out pollutants like nitrogen, phosphorus, and heavy metals
- Recharges local groundwater supply naturally
- Attracts pollinators, butterflies, and birds
- Adds curb appeal and landscape value to your property
- Can reduce your yard’s need for irrigation
According to the U.S. Environmental Protection Agency, urban stormwater runoff is one of the leading causes of water pollution in the country. Building a rain garden is a direct, local solution you can implement yourself.
Transitioning from a problem to a solution doesn’t get much more satisfying than this.
How to Choose the Perfect Location for Your Rain Garden
Location is everything when learning how to create a rain garden that actually works. The wrong spot can lead to standing water, root rot, or even basement flooding.
What to Look For
First, identify where runoff flows on your property during a rainstorm. Watch from a window — where does the water collect? Common source areas include:
- Downspouts and gutters
- Driveway edges and sloped walkways
- Lawn low points where water pools
Distance Rules to Follow
Always position your rain garden at least:
- 10 feet from your home’s foundation
- 25 feet from a septic system
- 50 feet from a steep slope greater than 12%
Check whether your area has a high water table by digging a test hole 8–12 inches deep. If it fills with water and doesn’t drain within 24 hours, choose a different location or amend the soil infiltration rate.
South- or east-facing locations with at least partial sunlight work best for most native plants used in rain gardens. Good sun exposure helps plants thrive and speeds up water absorption.
How to Size Your Rain Garden Correctly
Sizing is one step that beginners often overlook. Too small, and your rain garden won’t handle the runoff. Too large, and you’ll waste time and money digging.
Quick Sizing Formula
Use this simple rule of thumb:
Rain garden area = 20–30% of the drainage area feeding it
For example, if your roof section feeding a downspout covers 500 square feet, your rain garden should be roughly 100–150 square feet.
| Drainage Area (sq ft) | Recommended Rain Garden Size | Approximate Depth |
|---|---|---|
| 200 sq ft | 40–60 sq ft | 6–8 inches |
| 500 sq ft | 100–150 sq ft | 8–12 inches |
| 1,000 sq ft | 200–300 sq ft | 10–14 inches |
| 2,000 sq ft | 400–600 sq ft | 12–18 inches |
The ponding depth — how deep the water sits temporarily — should be no more than 6–12 inches. Water should drain completely within 24–48 hours. If it lingers longer, you likely have a soil drainage issue to address.
How to Prepare the Soil for a Rain Garden
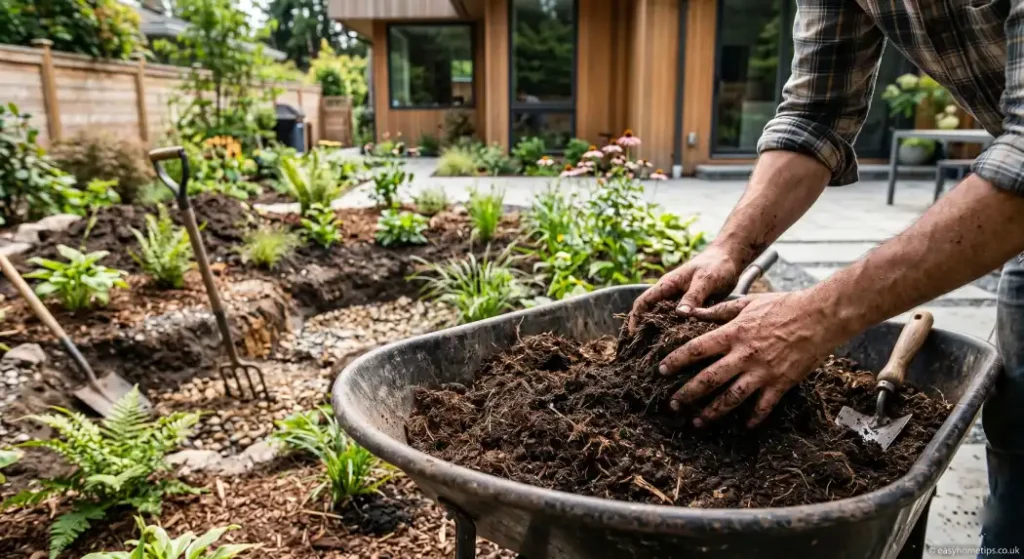
Now that you’ve chosen your spot and calculated your size, it’s time to dig in — literally. Soil preparation is the backbone of knowing how to create a rain garden that performs well season after season.
The Right Soil Mix
Standard clay-heavy lawn soil compacts too easily and drains too slowly for a rain garden. Instead, use a blend often called rain garden soil mix or amended planting soil:
- 50–60% coarse sand (not playground sand)
- 20–30% topsoil
- 20–25% organic compost
This mixture promotes rapid water infiltration while still providing nutrients for plants. Avoid high-clay soils unless you plan to fully replace the native soil.
Digging the Basin
Mark your rain garden outline with spray paint or a garden hose. Then:
- Remove sod and top 6–8 inches of soil
- Create a flat-bottomed bowl shape — not a cone
- Build a berm (small raised edge) on the downhill side using excavated soil
- Slope the basin sides at a gentle 3:1 or 4:1 ratio for stability
The flat bottom ensures even water distribution across the planting zone. The berm holds water in place while it slowly infiltrates — a critical detail in effective rain garden construction.
Which Plants Work Best in a Rain Garden?
Plant selection makes or breaks a rain garden. You need species that can handle both temporary flooding and dry spells between storms. That’s where native plants shine.
Why Native Plants Are the Smart Choice
Native plants have deep root systems — sometimes 6 to 15 feet deep — that dramatically improve soil infiltration and anchor the rain garden structure. They’re also adapted to local rainfall patterns, so they need less care once established.
Recommended Rain Garden Plants by Zone
Wet Zone (center of basin):
- Blue flag iris (Iris versicolor)
- Cardinal flower (Lobelia cardinalis)
- Swamp milkweed (Asclepias incarnata) — great for pollinators
- Soft rush (Juncus effusus)
Middle Zone:
- Black-eyed Susan (Rudbeckia hirta)
- Joe Pye weed (Eutrochium purpureum)
- Native sedges (Carex species)
- Switchgrass (Panicum virgatum)
Outer Edge (drier zone):
- Purple coneflower (Echinacea purpurea)
- Little bluestem grass (Schizachyrium scoparium)
- Wild bergamot (Monarda fistulosa)
Avoid invasive species and traditional turf grasses, which have shallow roots and poor water absorption rates. Stick with native perennials and ornamental grasses for the lowest maintenance and best performance.
Step-by-Step: How to Create a Rain Garden From Scratch
Here’s the complete process for how to create a rain garden, pulled together in one actionable sequence. Follow these steps and you’ll have a functioning garden in a single weekend.
Step 1 — Plan and Mark
Locate your runoff source (usually a downspout). Mark the rain garden area using spray paint or hose. Confirm distances from your foundation, septic, and utilities. Call 811 (in the U.S.) to check for underground lines before digging.
Step 2 — Dig the Basin
Excavate 8–12 inches deep with a flat bottom. Keep the removed soil nearby — you’ll use it for the berm. Shape the sides at a gentle slope.
Step 3 — Build the Berm
Pile excavated soil on the downhill side to form a berm 6–8 inches high. Compact it gently. This structure holds water inside your rain garden during heavy storms.
Step 4 — Amend the Soil
Fill the basin with your rain garden soil mix. Blend it into the native soil at the edges for a smooth transition.
Step 5 — Install an Inlet and Overflow
Redirect a downspout into the garden using a buried pipe or a rock-lined channel called a splash pad. Add a simple overflow channel or pipe at the far edge so excess water exits safely — not toward your foundation.
Step 6 — Plant and Mulch
Plant your native plants in their designated zones (wet, middle, outer). Add 2–3 inches of hardwood mulch to retain moisture and reduce weeds. Avoid dyed mulch — it can leach chemicals into the groundwater.
Step 7 — Water and Establish
Water newly planted areas regularly for the first two growing seasons. Once established, native plants rarely need supplemental irrigation. Your rain garden will essentially maintain itself.
Rain Garden Maintenance: How to Keep It Thriving
One of the biggest myths about rain gardens is that they’re high maintenance. In reality, a properly designed rain garden is one of the lowest-maintenance landscapes you can create.
Seasonal Maintenance Checklist
Spring:
- Clear out any debris, leaves, or sediment from the basin
- Check the inlet and overflow for clogs
- Divide overcrowded native perennials if needed
Summer:
- Water during extended dry spells in the first two years
- Hand-pull weeds before they go to seed
- Watch for signs of erosion on the berm
Fall:
- Leave seed heads standing — they feed birds through winter
- Cut back plants to 6–8 inches after the first hard frost
- Add fresh mulch if the layer has thinned
Winter:
- No action needed; the rain garden rests
- Frozen soil still directs runoff to the basin area
What to Watch For
If water is standing for more than 48 hours after a storm, your soil infiltration may be compromised. Gently aerate the basin and top-dress with fresh rain garden soil mix. Also check that the inlet isn’t directing sediment directly into the basin — a rock splash pad at the entry point prevents this.
The long-term reward? A self-sustaining, eco-friendly landscape that handles stormwater quietly, beautifully, and without any input from you.
Common Mistakes to Avoid When Building a Rain Garden
Even enthusiastic gardeners make avoidable errors. Here are the top mistakes people make when learning how to create a rain garden — and how to dodge each one.
Planting Too Close to the Foundation
This is the most common — and most costly — mistake. Always maintain that 10-foot buffer between your rain garden and your home. Saturated soil near a foundation can cause basement flooding or structural damage over time.
Using the Wrong Soil
Regular lawn soil or pure clay will turn your rain garden into a mud pit. Always use a well-draining soil mix that allows water to percolate within 24 hours. Test drainage rates before planting by filling the dug basin with water and timing how long it takes to empty.
Skipping the Overflow
Every rain garden needs an overflow outlet. Without one, a heavy storm can cause water to pool uncontrollably and erode your berm or flood nearby areas. A simple overflow pipe or gravel channel solves this entirely.
Choosing Non-Native Plants
Exotic plants often lack the deep root systems needed for effective water infiltration. They may also struggle with the wet-dry cycles a rain garden creates. Stick with regionally appropriate native plants for best results.
Not Testing the Site First
Before finalizing your design, run a percolation test: dig a hole 12 inches deep, fill it with water, and measure how long it takes to drain. Ideal infiltration rate is 0.5–1 inch per hour. If it’s much slower, you’ll need to amend the soil extensively or choose a different site.
Frequently Asked Questions About How to Create a Rain Garden
How deep should a rain garden be?
Most rain gardens are dug to a depth of 6–12 inches, depending on your soil type and the size of the drainage area. Clay-heavy soils need shallower basins with heavily amended soil mix, while sandy soils can handle deeper basins. The key is that water should drain completely within 24–48 hours after a storm. Any longer and you risk mosquito breeding and plant root rot.
What is the best soil for a rain garden?
The best rain garden soil is a blend of 50–60% coarse sand, 20–30% topsoil, and 20–25% compost. This combination drains quickly, retains enough nutrients for plants, and resists compaction. Avoid pure native soil unless you’ve tested and confirmed it has an adequate infiltration rate. Pre-mixed bioretention soil is also available at many landscaping suppliers.
Can I create a rain garden in a small yard?
Absolutely. Even a 50–100 square foot rain garden can make a meaningful difference in managing stormwater runoff from a typical downspout. Small rain gardens work especially well in urban settings where every square foot counts. Focus on compact native plants like sedges, black-eyed Susans, and dwarf switchgrass to keep the planting proportional and tidy.
How long does it take to build a rain garden?
For a typical residential rain garden of 100–200 square feet, most homeowners complete the project over one weekend. Day one covers digging, soil amendment, and berm construction. Day two handles planting, mulching, and inlet setup. Establishing the plants fully takes one to two growing seasons, but the garden functions from the very first rain.
Do rain gardens attract mosquitoes?
A properly designed rain garden does NOT create mosquito breeding habitat. Mosquitoes need standing water for at least 5–7 days to breed. Since a well-built rain garden drains completely within 24–48 hours, it doesn’t give mosquitoes enough time. The key is good soil drainage and correct sizing. If water lingers longer than 48 hours, recheck your soil mix and outlet.
Conclusion: Your Rain Garden Starts Today
Now you know exactly how to create a rain garden that’s beautiful, functional, and built to last. From choosing the right location and sizing the basin to selecting native plants and setting up proper stormwater drainage, every piece of the puzzle is within reach.
The truth is, a rain garden isn’t just a landscaping upgrade — it’s a genuine environmental contribution. Every time it rains, your garden is quietly doing something remarkable: filtering stormwater runoff, recharging the groundwater, feeding pollinators, and protecting local waterways.
You don’t need a big budget or professional equipment. You need a plan, a weekend, and a willingness to dig. So grab a shovel, sketch out your spot, and take that first step toward a smarter, greener yard.
Your rain garden is waiting — and the next rainstorm is the perfect test run.


